Short answer: New construction painting typically moves through eight stages – scope review, surface-readiness checks, protection and preparation, priming, interior finish painting, exterior or wood finishing, trade coordination and touch-ups, and a final walkthrough.
The exact order changes with the builder’s schedule, drywall completion, trim and cabinet installation, flooring, exterior materials, weather, and the type of property. A custom home, commercial building, addition, shop, or outbuilding may require painting to be completed in several visits.
For builders and owners, early planning is critical. Involving the painting contractor before colors, products, surfaces, and deadlines are locked in helps prevent missed scope, incompatible coatings, late selections, repeated touch-ups, and conflicts between trades.
What Are the Main Steps in New Construction Painting?
- Review the plans, specifications, surfaces, colors, and finish schedule
- Confirm that drywall, trim, siding, and other substrates are ready
- Protect installed materials and prepare each surface
- Prime new drywall, bare wood, and other surfaces as required
- Apply finishes to ceilings, walls, trim, doors, cabinets, and built-ins
- Complete exterior painting and wood finishing when conditions allow
- Coordinate with other trades and complete approved touch-ups
- Complete cleanup, inspection, and the final walkthrough
This sequence is a working framework, not a rigid order. A professional painter adjusts it to protect completed work, coordinate with other trades, and keep the overall construction schedule moving.
Why Is New Construction Painting Different From Repainting?
Repainting an existing property usually involves surfaces that already have a coating system. New construction begins with bare or newly installed materials that have never been finished.
A new project may include fresh drywall, joint compound, unfinished trim, new doors, bare wood, manufactured siding, metal, masonry, built-ins, cabinets, and architectural features. Each surface can have different preparation, primer, product, and application requirements.
The painter is also working within an active construction schedule. Drywall crews, finish carpenters, cabinet installers, electricians, plumbers, flooring installers, countertop fabricators, exterior contractors, and inspectors may all need access to the same areas.
New construction painting therefore depends on planning, sequencing, and communication as much as paint application. Learn more about Axiom Painting’s complete new construction painting services for homes, commercial buildings, additions, shops, and custom projects.
Phase 1: Plans, Specifications, and Scope Review
The first phase establishes exactly what the painting contractor is responsible for finishing. The plans and specifications should be reviewed alongside the actual job site and construction schedule.
Depending on the project, this review may address:
- Interior walls, ceilings, trim, doors, and finish carpentry
- Drywall primer and finish coats
- Built-ins, shelving, beams, cabinets, and vanities
- Exterior siding, trim, fascia, soffits, doors, and garages
- Exterior wood staining and architectural details
- Commercial or specialty coatings
- Shops, outbuildings, additions, and detached structures
- Colors, sheen levels, products, and finish expectations
- Access, lifts, scaffolding, heat, ventilation, and material storage
- Construction phases, target dates, and return visits
The proposal should also identify exclusions. If drywall repair, caulking, cabinet finishing, exterior staining, specialty coatings, or post-installation touch-ups are not included, that should be clear before work begins.
Phase 2: Confirming the Surfaces Are Ready
Painting should begin only after the surfaces included in that phase are ready for preparation and coating. Starting before drywall compound, wood, masonry, caulk, or other materials are sufficiently dry can create problems that become visible later.
Interior readiness may include:
- Drywall installed, taped, finished, sanded, and dry
- Drywall dust and construction debris removed
- Rooms accessible to the painting crew
- Temporary heat, lighting, and ventilation available when required
- Trim, doors, cabinets, and built-ins installed according to the agreed sequence
- Wet work completed or isolated from painting areas
- Colors, products, and sheen levels approved
Exterior readiness may depend on siding and trim installation, roofing, flashing, stonework, gutters, grading, landscaping, surface moisture, temperature, precipitation, and equipment access.
Drywall Finish Levels and Lighting
The specified drywall finish should match the final paint, sheen, color, and lighting conditions. Dark colors, higher-sheen coatings, large windows, long walls, and strong side-lighting can make surface irregularities more visible.
Primer can reveal missed sanding, ridges, fastener areas, joints, and other imperfections that were difficult to see on unprimed drywall. It does not automatically convert a lower drywall finish into a higher finish level.
The contract should establish who is responsible for drywall corrections discovered after priming and how those corrections will be reviewed before finish coats proceed.
Phase 3: Protection and Surface Preparation
New construction may not contain furniture or personal belongings, but it still includes materials that require careful protection. Windows, stone, roofing, cabinets, countertops, flooring, fixtures, hardware, equipment, landscaping, and completed work from other trades may all be vulnerable to overspray, drips, dust, or accidental damage.
Preparation varies by substrate and may include:
- Removing drywall and construction dust
- Sanding rough areas and raised fibers
- Filling nail holes and minor finish-carpentry imperfections
- Caulking selected trim joints and gaps included in the scope
- Masking windows, doors, hardware, fixtures, and adjacent materials
- Protecting floors, cabinets, stone, roofing, patios, and landscaping
- Cleaning exterior materials and removing surface contamination
- Spot priming knots, stains, exposed fasteners, and repaired areas
- Confirming compatibility between the substrate, primer, and finish product
The preparation scope should reflect the final finish expectations. A utility space with a basic coating specification may not require the same finish level as a high-visibility living area with large windows, dark paint, and detailed trim.
Phase 4: Priming New Construction Surfaces
Primer prepares and seals the substrate so the finish coats can develop a more consistent appearance and perform as intended. The same primer should not be assumed to work on every material.
New Drywall
Bare drywall and joint compound absorb coatings differently. An appropriate drywall primer or primer-sealer helps create a more uniform surface before the finish paint is applied.
After the primer dries, the walls and ceilings should be reviewed for visible sanding marks, ridges, joints, fastener areas, damage, or other corrections. Approved repairs may need to be sanded and spot primed before finish coats continue.
Bare Wood, Trim, and Doors
New wood may require sanding, cleaning, filling, caulking, and a primer suited to the species and proposed coating. Knots, resins, tannins, mill glaze, moisture, and factory-applied finishes can influence the preparation and primer selection.
Trim and doors may be primed or prefinished before installation, finished in place, or completed through a combination of shop and field work. The agreed sequence should account for installation damage, nail filling, caulking, masking, and final touch-ups.
Exterior and Specialty Substrates
Wood siding, engineered siding, fiber cement, metal, masonry, drywall, and other materials do not all use the same primer or coating system. Manufacturer requirements and the project specification should guide product selection, surface preparation, curing requirements, and application conditions.
Phase 5: Ceilings, Walls, Trim, Doors, and Built-Ins
There is no single painting order used on every new construction project. The sequence may change depending on whether trim is installed or prefinished, whether the crew is spraying or rolling, which floors are installed, and how the builder has organized the other trades.
A common interior sequence may include drywall primer, ceiling finishes, initial wall coats, trim and door preparation, trim finishes, final wall coats, detailed cut lines, and approved touch-ups. Another project may finish portions of the trim before the final wall coats or complete different areas in separate phases.
Ceilings
Ceilings are often completed early because spraying or rolling overhead surfaces can affect nearby walls and trim. Ceiling texture, height, beams, lighting, access, and the selected finish can change the preparation and application plan.
Walls
Wall finishes should be applied after the primer and any approved drywall corrections are complete. The number of finish coats depends on the specification, color, product, substrate, application method, and coverage required for a consistent result.
For broader information about finished residential spaces, visit Axiom Painting’s interior painting services.
Trim and Doors
Baseboards, casings, windowsills, crown molding, interior doors, stair components, and other finish carpentry require detailed sanding, filling, caulking, priming, and application. These surfaces may be sprayed, brushed, rolled, or finished through a combination of methods depending on the project.
The sequence should leave enough time to correct installation damage and produce clean transitions between trim, walls, doors, and adjacent materials.
Cabinets and Built-Ins
Cabinets may arrive factory finished, be finished by a separate cabinet contractor, or be included in the painting scope. Built-ins, shelving, vanities, and other custom woodwork should be clearly identified in the plans and estimate.
When cabinets are included, the coating system, color, sheen, application location, masking, drying conditions, hardware, and protection requirements should be established separately from standard wall painting. Learn more about Axiom Painting’s cabinet painting and refinishing capabilities.
Phase 6: Exterior Painting and Wood Finishes
Exterior construction painting may proceed on a different schedule from the interior. Weather, temperature, moisture, direct sunlight, siding installation, roofing, stonework, gutters, grading, landscaping, and equipment access can all affect when exterior work is completed.
The exterior scope may include:
- Siding and exterior wall surfaces
- Trim, fascia, soffits, and eaves
- Garage doors and service doors
- Entry doors and architectural details
- Beams, posts, pergolas, and exterior wood
- Shops, garages, and detached buildings
- Metal, masonry, and specialty substrates included in the plans
Paint and stain decisions should be based on the material, exposure, desired appearance, and future maintenance path. Our guide comparing paint versus stain for exterior wood in North Idaho explains the primary differences.
For complete exterior scopes, visit Axiom Painting’s exterior painting page.
Phase 7: Trade Coordination and Construction Touch-Ups
Painting is rarely the final activity on a construction site. Electricians, plumbers, flooring installers, cabinet crews, finish carpenters, appliance installers, countertop fabricators, inspectors, and cleaning crews may continue working after portions of the painting are complete.
That activity can create scuffs, nail holes, patches, caulk changes, damaged corners, new penetrations, and areas that were previously inaccessible. The painting agreement should explain which return visits and touch-ups are included and which damage or changes require additional approval.
A coordinated process may include:
- Completing initial painting before sensitive flooring or fixtures are installed
- Protecting completed finishes during later construction phases
- Maintaining a documented punch list
- Separating normal painting corrections from damage caused by later trades
- Approving added rooms, surfaces, colors, or coating changes in writing
- Scheduling final touch-ups after major installations are complete
Clear responsibility prevents the painter, builder, owner, and other trades from making different assumptions about who will complete the final corrections.
Phase 8: Final Inspection and Walkthrough
The final inspection should take place after the agreed painting scope and approved punch-list work are complete. The property should have enough lighting and access to review the finished surfaces.
The walkthrough may include:
- Checking color and sheen consistency
- Reviewing walls, ceilings, trim, doors, and detailed surfaces
- Inspecting exterior siding, trim, doors, and wood finishes
- Confirming that approved touch-ups are complete
- Removing masking, coverings, equipment, and painting debris
- Reviewing remaining exclusions or construction damage
- Documenting final approval and any agreed follow-up
Some coatings continue curing after they are dry to the touch. Finished surfaces should be protected from cleaning, hardware installation, heavy contact, or other use according to the product requirements.
How Long Does New Construction Painting Take?
There is no reliable new construction painting timeline based on square footage alone. A painting contractor may visit the project several times as different surfaces become ready.
The schedule can be affected by:
- Project size and number of structures
- Interior, exterior, or combined scope
- Drywall and finish-carpentry readiness
- Ceiling height, stairwells, and equipment access
- Number of colors, sheen levels, and detailed finishes
- Trim, doors, cabinets, built-ins, and architectural features
- Product drying and recoat requirements
- Exterior weather and surface moisture
- Scheduling and changes involving other trades
- Repairs or corrections discovered after priming
The estimate and construction schedule should identify the anticipated phases rather than treating the entire painting scope as one uninterrupted visit.
How Builders and Owners Can Keep Painting on Schedule
Builders and property owners can reduce delays by making finish decisions early and keeping responsibilities clear.
- Involve the painting contractor before the finish schedule is finalized
- Provide current plans and written specifications
- Confirm who approves colors, products, finishes, and changes
- Finalize colors and sheen levels before materials are ordered
- Use samples on representative surfaces where appropriate
- Confirm that drywall and other substrates are ready before scheduling
- Communicate changes to trim, cabinets, siding, or room use promptly
- Keep painting areas accessible and protect completed work
- Use written change approvals for added work
- Schedule the final touch-up phase after major trade work is complete
A Real New Construction Painting Project in Hayden
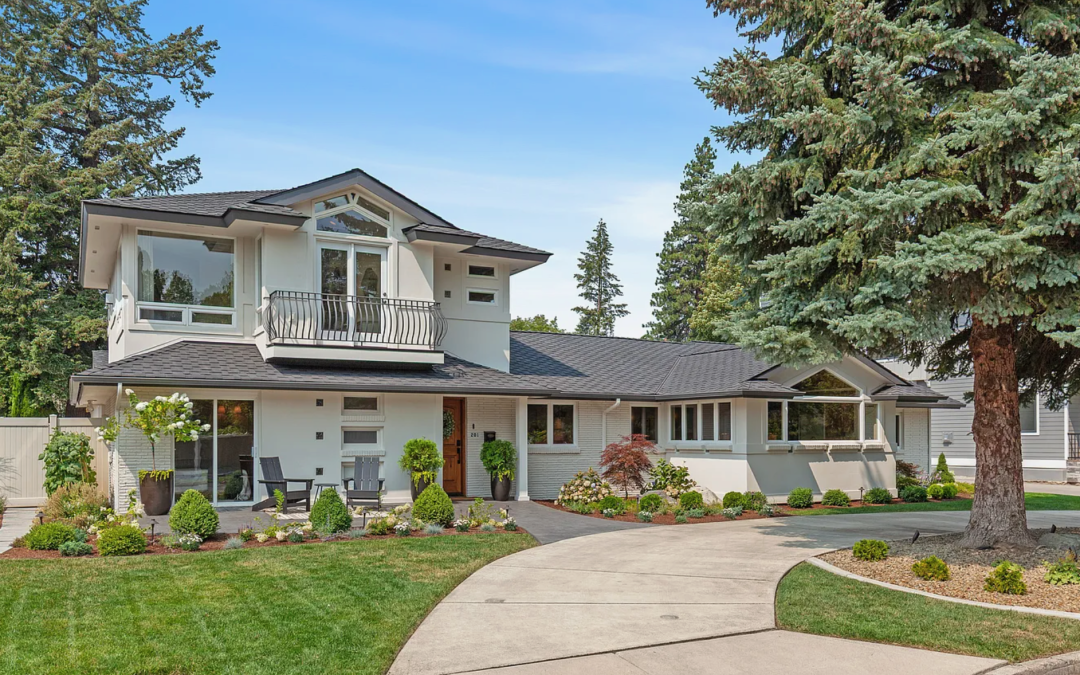
Axiom Painting completed the full interior and exterior painting for a custom home built by Aspen Homes in Hayden, Idaho.
The project included new drywall, walls, ceilings, trim, doors, siding, fascia, and other architectural surfaces. Painted areas were coordinated with stonework, natural wood ceilings, cabinetry, roofing, and additional design features throughout the home.
The work progressed in stages alongside the builder and other trades, from preparation and primer through finish coats and final touch-ups. Completing both the interior and exterior allowed the painting process to follow one coordinated standard across the property.
View the complete Hayden new construction painting project for photographs and additional project details.
What Should a New Construction Painting Estimate Include?
A useful new construction painting estimate should clearly identify the scope, products, surfaces, preparation, schedule, touch-ups, and responsibilities.
Depending on the project, the estimate should address:
- Plans, specifications, and surfaces included
- Interior, exterior, or combined scope
- Drywall finish and primer requirements
- Wall, ceiling, trim, door, cabinet, and built-in finishes
- Siding, fascia, soffits, exterior doors, and wood finishes
- Products, colors, sheen levels, and coating systems
- Preparation and protection requirements
- Number of planned painting phases and return visits
- Access, lifts, temporary heat, lighting, and ventilation
- Responsibility for drywall and carpentry corrections
- Included touch-ups and construction punch work
- Construction damage and change-order procedures
- Cleanup, final inspection, and walkthrough
Before selecting a painter, review our guide on how to choose a painting contractor in Spokane and North Idaho.
Planning a New Construction Painting Project?
Axiom Painting works with homeowners, builders, contractors, and property owners on new construction painting throughout Spokane, Spokane Valley, Liberty Lake, Coeur d’Alene, Post Falls, Hayden, Rathdrum, and nearby Inland Northwest communities.
Projects may include custom homes, commercial buildings, additions, remodeled spaces, garages, shops, outbuildings, interior finishes, exterior coatings, and coordinated full-property scopes.
Explore our new construction painting services, learn about shop and outbuilding painting, or request a free painting estimate to discuss the plans, surfaces, schedule, and finish requirements.
New Construction Painting Process FAQs
When should a painting contractor become involved in a new construction project?
The painting contractor should become involved early enough to review the plans, specifications, surfaces, colors, products, finish levels, access, and proposed schedule. Early involvement can identify missing scope items and sequencing conflicts before they affect construction.
When does interior painting begin during new construction?
Interior painting commonly begins after drywall has been installed, taped, finished, sanded, and allowed to dry. The exact starting point depends on the builder’s schedule, trim and cabinet sequence, site conditions, access, and the surfaces included in the painting phase.
Does new drywall need primer before finish paint?
New bare drywall is typically primed or sealed before finish coats are applied. Drywall and joint compound can absorb coatings differently, and an appropriate primer helps prepare the surface for a more uniform finish. The selected primer should follow the project specification and coating manufacturer’s requirements.
Why do drywall imperfections become visible after priming?
Primer creates a more uniform surface and can make joints, sanding marks, ridges, fastener areas, and other irregularities easier to see. Those areas may have been difficult to identify on unfinished drywall. The project scope should establish who completes corrections found after the prime coat.
What order are ceilings, walls, trim, and doors painted?
The order varies by project. It may depend on whether trim and doors are prefinished or installed, whether coatings are sprayed or rolled, when flooring and cabinets are installed, and how the builder sequences other trades. The painter should establish an order that protects completed work and reduces avoidable rework.
When are final painting touch-ups completed?
Final touch-ups are generally completed after major installations and trade activity are finished. The contract should distinguish normal painting corrections from new damage, added surfaces, drywall changes, or other work that requires separate approval.